Organizing headshots for your team doesn't have to be stressful. But it absolutely requires planning. I've run headshot days for teams of 10 and teams of 300, and the ones that go smoothly all have one thing in common: someone on the client side followed a timeline and owned the coordination. The photographer handles the photography. You handle the logistics of getting your people into the room. Here's the exact playbook I send to every HR and marketing coordinator before a shoot.
4 Weeks Before
Book your photographer and lock in the date. This seems obvious, but I've had clients try to schedule 40-person shoots with a week's notice. I can usually make it work in an emergency, but the coordination quality drops and you'll have more no-shows because people didn't have time to prepare.
Choose your room. You need a space that's at least 10 feet wide by 12 feet deep. That gives enough room for the lighting rig, backdrop stand, camera on a tripod, and the tethered review station without cramming everything together. Ceiling height matters too. Anything under 8 feet limits where I can position lights. Standard drop ceilings work fine. Low-clearance storage rooms and basement conference rooms don't. I've had to turn down rooms that looked great on paper but had 7-foot ceilings.
Check for windows. Ideally, pick a room with no windows or with windows you can fully cover. Ambient daylight shifts throughout the day as clouds move and the sun changes position. That shifting light creates visible inconsistency between the person photographed at 9 AM and the person at 4 PM. Blackout curtains or a windowless conference room solve this completely.
Confirm power outlet access. I need at least two standard outlets within 10 feet of the shooting area. Studio strobes pull real power, and running extension cords across a hallway is a tripping hazard your facilities team will hate.
Determine who needs headshots. Build your complete list now, not the week before. Include new hires, anyone whose headshot is more than two years old, and anyone who's had a significant appearance change. Getting this list right early prevents the scramble of adding 15 people the day before.
Send the initial announcement to the team. Keep it simple: date, time range, location, and what to expect. People need lead time to plan their wardrobe. Springing it on them the week of guarantees half your team shows up in wrinkled polos.
2 Weeks Before
Send wardrobe and preparation guidelines. I provide a prep email template you can customize with your brand's dress code. It covers solid colors, grooming timing, and what to avoid. Don't skip this step. The quality difference between a team that got wardrobe guidance and one that didn't is immediately visible in the final photos.
Open scheduling. I'll send you a Google Sheet with 10-minute slots for each person. Share the link and let people self-schedule. Ten minutes per person is the standard slot, and that covers arrival, shooting, tethered review, and transition to the next person. For executives or partners who want more time, multiple looks, or outfit changes, block 20-minute slots. In my experience, self-scheduling fills about 70% of slots within two days. The remaining 30% need a nudge from their manager.
Confirm the room one more time. This is not paranoia. Rooms get reassigned constantly. Meetings get moved into "your" conference room. Check with facilities that the space is still yours for the entire day, including 45 minutes before the first appointment for setup. I've arrived at offices to find the room double-booked more times than I'd like to count.
Coordinate building access for the photographer. I need to know: where to park (especially if I'm unloading 80 pounds of equipment from my car), which entrance to use, whether I need a visitor badge, and who to call if I arrive and the door is locked. A contact name and cell number for the day-of coordinator saves everyone 20 minutes of confusion at 7:45 AM.
Day Before
Send a reminder email to all participants. Include their specific time slot, the room location, and a one-line wardrobe reminder. People forget, even when they're excited about it. This single reminder cuts no-shows by about half in my experience. Without it, expect 20-30% no-show rates. With it, you'll see closer to 10%.
Run a facilities checklist. Is the room temperature controllable? People sweat under studio lights, especially if the room starts warm. If you can set the thermostat to 68 degrees the morning of the shoot, do it. I've photographed in rooms where the AC was broken in July, and everyone looked shiny and miserable. Is there a mirror nearby? A restroom or hallway mirror within 30 seconds of the shooting room lets people do a final check before stepping in front of the camera. Is there a waiting area? You don't want four people standing in the shooting room watching someone else get photographed. A few chairs in the hallway or an adjacent room keep the flow clean and give people privacy.
Confirm the photographer has everything they need: parking instructions, building access, room number, day-of contact name and cell, and the final schedule.
Ready to plan your team's headshot day?
We send you the full logistics playbook, scheduling template, and prep email for your team.
Get a QuoteDay Of
I arrive 45 minutes before the first appointment. That time covers unloading equipment, setting up the backdrop and lighting rig, configuring the tethered review station, and doing a test shot to check exposure, white balance, and framing for this specific room. Every room is different, from ceiling height to wall color and ambient light leaks, and the test shot confirms everything looks right before the first person sits down.
The first two or three people are the warmup slots. Not because they get worse photos (they don't) but because I'm dialing in the exact look during those first sessions. Fine-tuning the light position by a few inches, adjusting the backdrop tension, finding the right camera height for the room's ceiling. I always offer these early subjects a quick reshoot at the end of the day once everything is perfectly locked in.
Each person's session follows the same flow: they walk in, I position them, coach them through two or three expressions, shoot for about four minutes, then we review the images together on the tethered monitor. They pick their favorite right there. Done. Eight minutes total, start to finish. Then the next person walks in. It's assembly-line efficiency with individual attention. Nobody feels rushed, but nobody is waiting around either.
If someone doesn't show for their slot, I use that gap to accommodate walk-ins or give extra time to the next person. If someone shows up 20 minutes late, I fit them in at the next available gap rather than bumping everyone else's schedule. Flexibility is built into the system.
This is critical: keep one person from your team near the room all day as the coordinator. They handle late arrivals, answer questions from participants, and keep the flow moving. This person is the single biggest factor in whether the day runs smoothly or turns chaotic. Don't assign someone who has meetings all afternoon.
After the Shoot
Within one business day, each person receives a private link to their proofing gallery. This gallery contains their top images from the session, typically four to eight selects, so they can pick their favorite without sorting through hundreds of frames. Most people have their selection made within an hour of receiving the link.
Once selections are made, retouching takes two to three business days. My retouching standard covers skin smoothing, stray hair removal, minor blemish cleanup, and under-eye softening. I don't reshape faces, change body proportions, or alter bone structure. The goal is you on your best day, not a different person. People should recognize themselves. Their coworkers should recognize them.
Final files are delivered organized by last name, in two formats: a high-resolution version for print (300 DPI, full size) and a web-optimized version for LinkedIn, your website, and email signatures. Every file is named consistently (LastName_FirstName_2026) so your marketing team can sort and distribute without renaming 50 images manually.
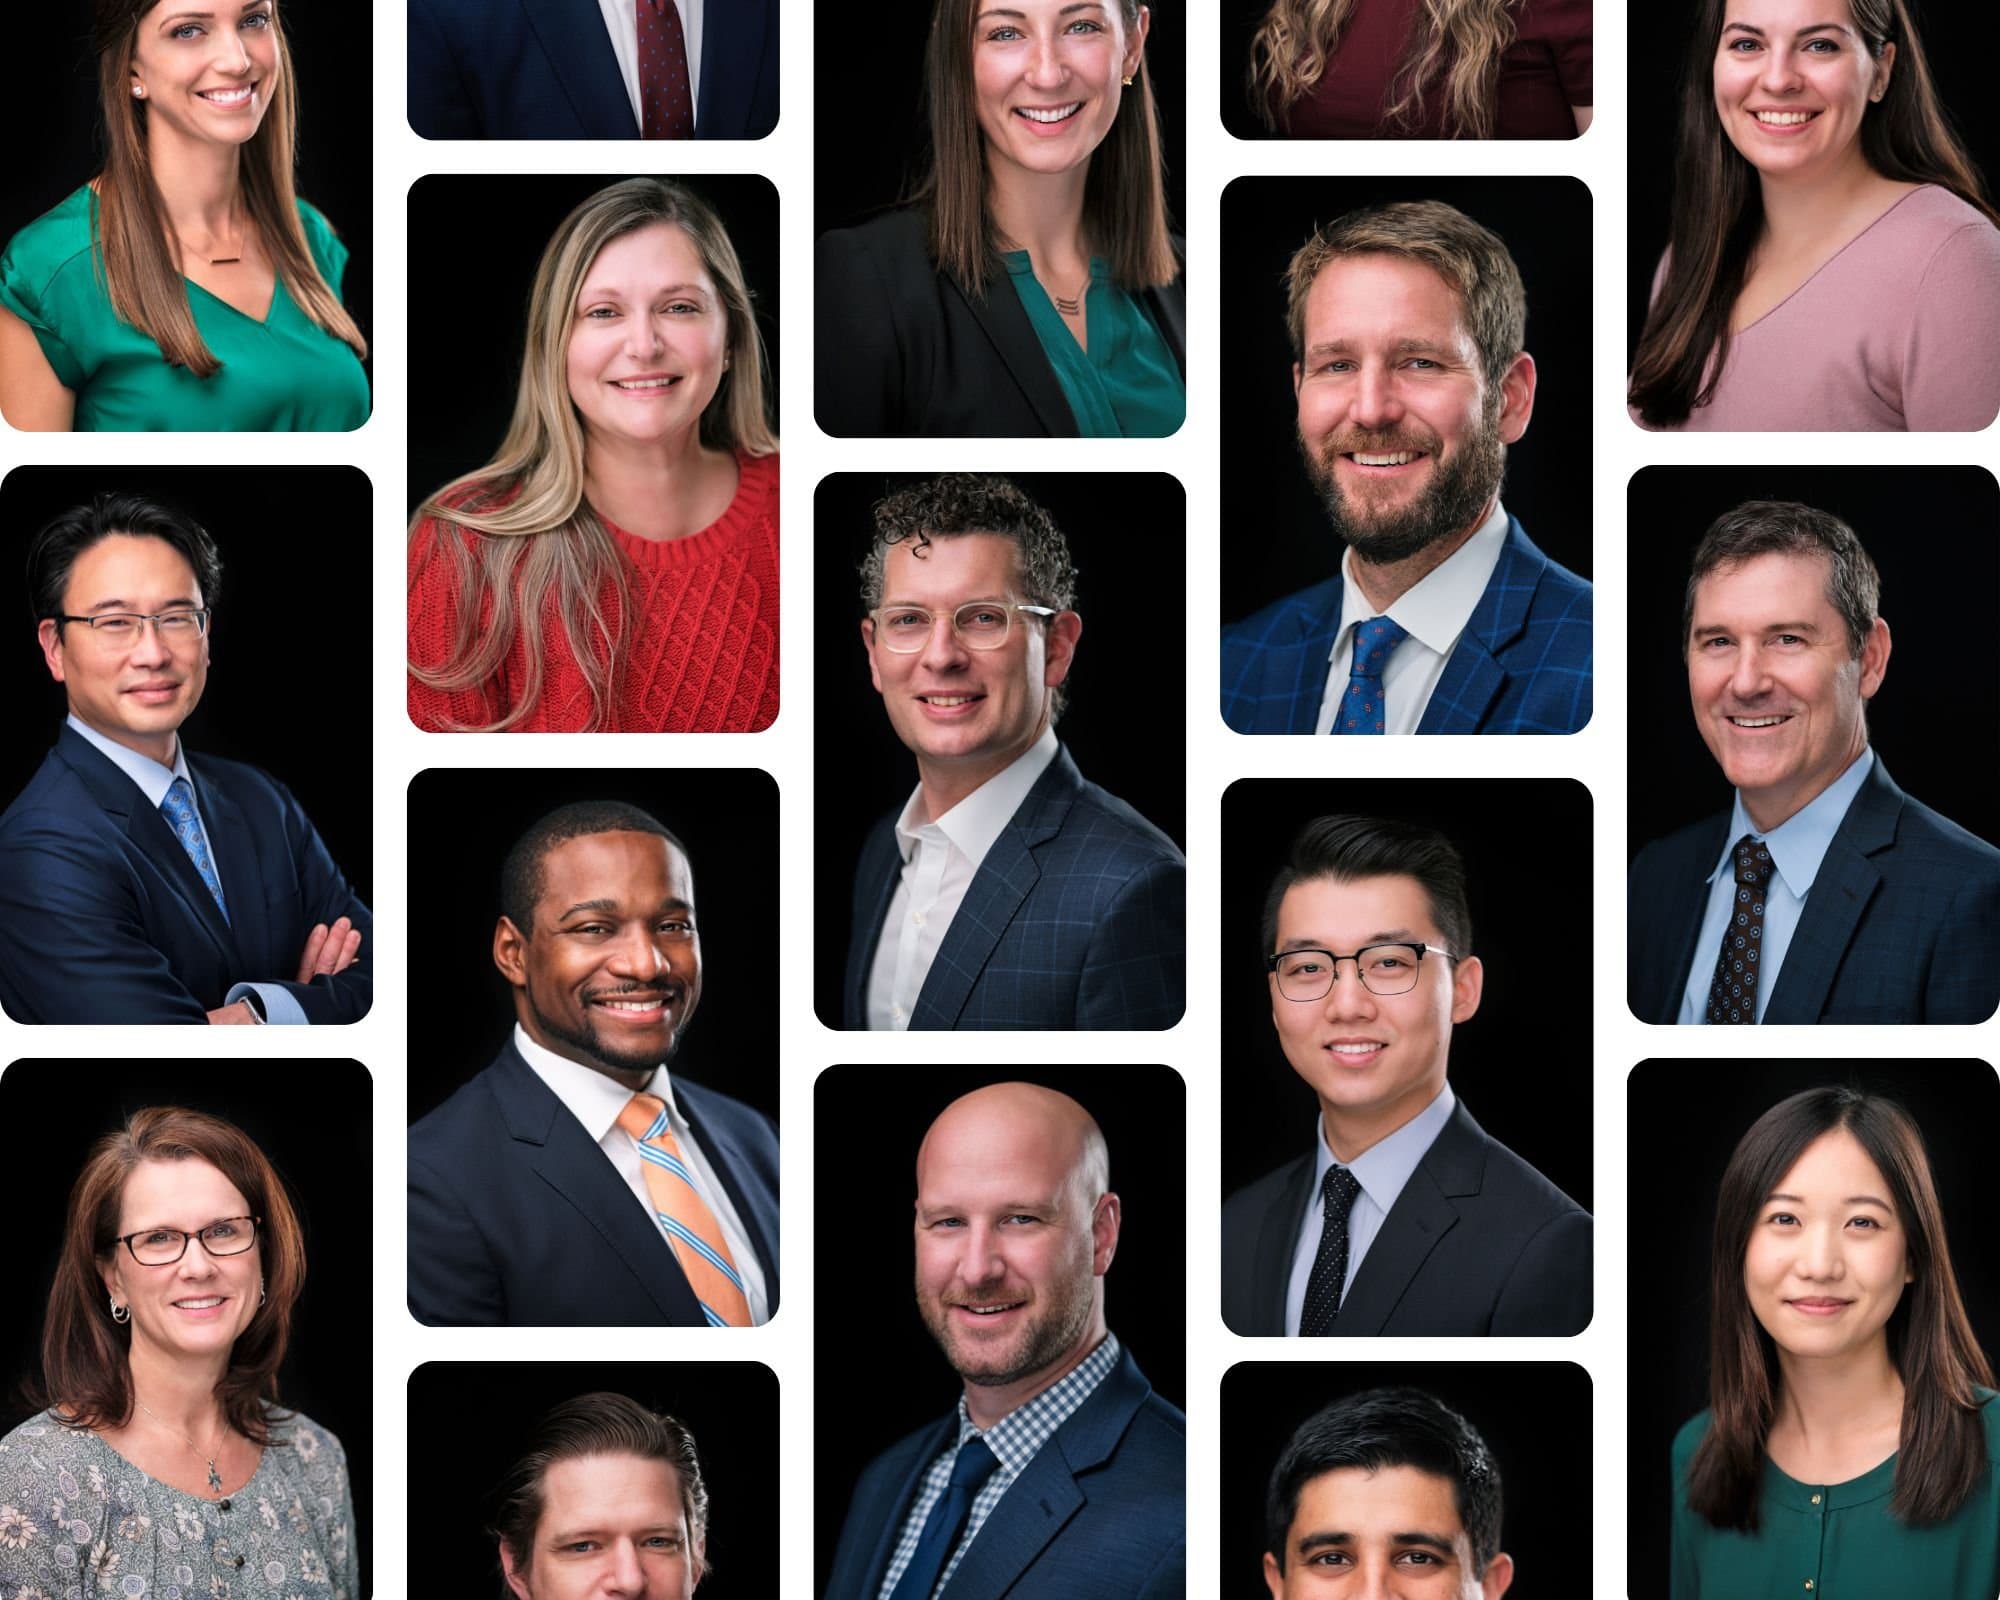
For ongoing programs, I schedule new hire sessions quarterly. When someone joins the team, they get photographed at the next scheduled visit using the documented lighting setup from the original shoot. Their headshot drops onto the team page and matches everyone else's, even if it was taken six months later. That consistency is the whole point.

Pro Tips from 200+ Headshot Days
Offer both scheduled and walk-in times. Some people prefer to plan ahead. Others will only participate if they can drop in when it's convenient. I block the last hour of the day as open walk-in time and it consistently catches 5-10 people who didn't sign up but decide to participate when they see coworkers coming back to their desks looking sharp. Those walk-ins often include people who were nervous and needed social proof before committing.
Schedule your most enthusiastic people first. This is a deliberate strategy, not just convenience. When they come back to their desks saying "that was actually fun" and "it only took five minutes," the reluctant people relax. Social proof works inside organizations the same way it works everywhere else. Your early-morning volunteers are doing recruiting work for the rest of the day, and they don't even know it.