I've spent over a year shooting real client work through Dehancer Pro at this point: commercial fashion, corporate brand films, sunset lifestyle content, event recaps. Before Dehancer, my color grading workflow revolved around LUT packs. I had folders full of them: paid collections, free downloads, custom exports from DaVinci Resolve. Some were good. Most were mediocre. All of them shared the same fundamental limitation that I didn't fully appreciate until I stopped using them. This is my honest review of Dehancer Pro in 2026, why it replaced every LUT I owned, and whether it's worth the investment for working photographers and videographers.
The Problem With LUTs That Nobody Talks About
A LUT (a lookup table) is just a color transformation. It takes your digital image and remaps the colors to approximate a certain aesthetic. That's it. It doesn't model how film actually behaves. It doesn't understand how highlights compress, how grain interacts with exposure, or how light scatters through emulsion layers. When you apply a LUT to a blown highlight, the highlight stays blown. The information is gone and the LUT can't recover it. When you add grain from a LUT pack, it's a static overlay, a texture pasted on top of your image rather than grain that interacts with the luminance and color of the scene the way real film grain does.
This is why LUT-graded footage always looks almost right but never quite there. The highlights clip too hard. The grain feels flat. The colors are shifted but not transformed. You get 80% of the film look, and that last 20% is the difference between 'this was shot digital with a filter' and 'was this actually shot on film?' I chased that last 20% for years with LUTs and never got there.
What Dehancer Pro Actually Does Differently
Dehancer isn't applying a color grade. It's emulating the entire photochemical process of film photography, from how light enters the emulsion to how the negative gets developed and printed. The distinction matters because it produces results that are fundamentally different from anything a lookup table can achieve.
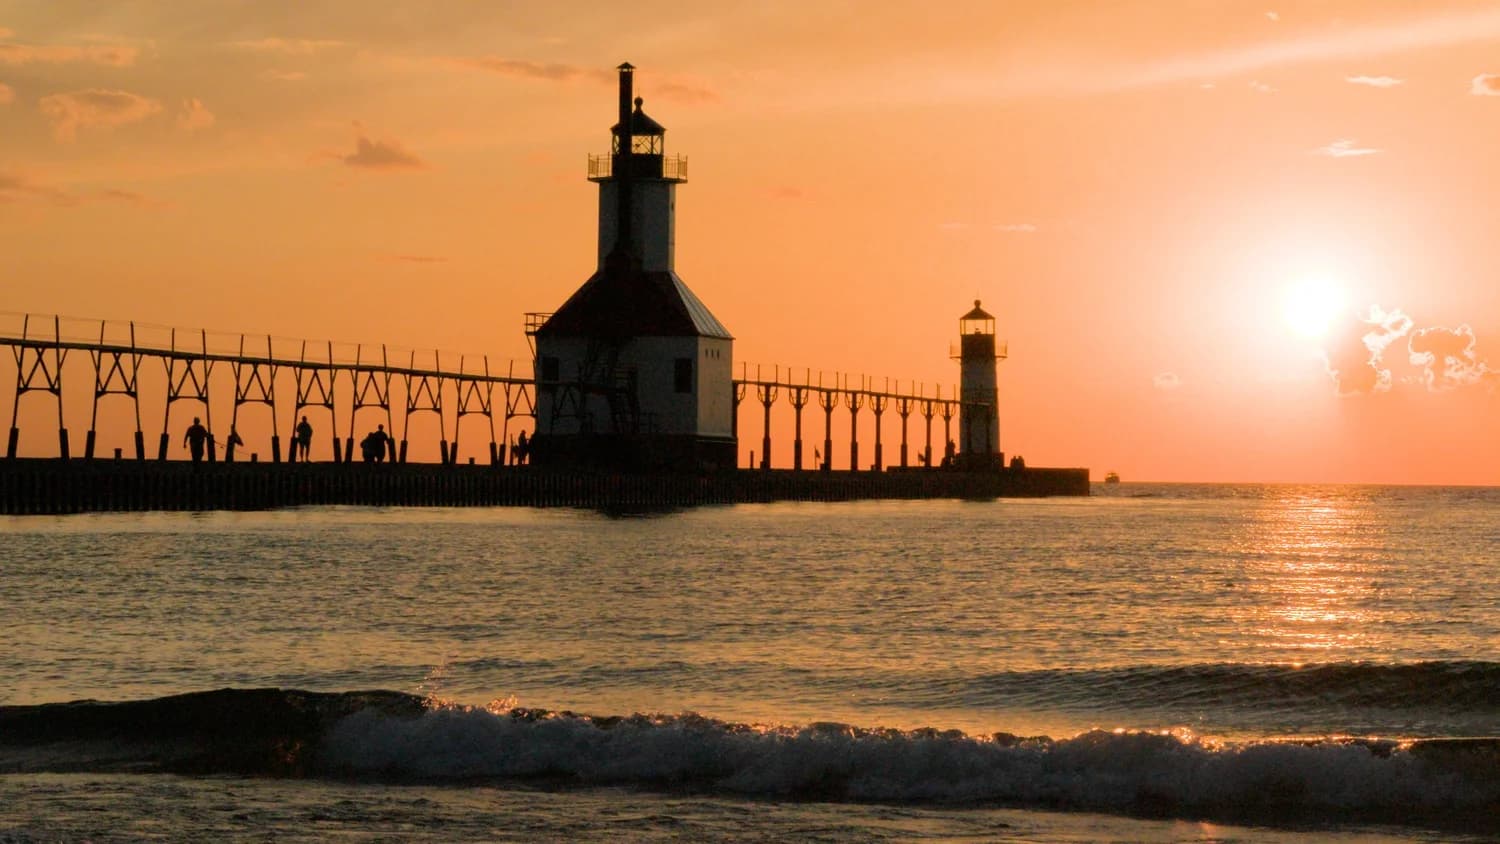
The headline feature is Film Compression. This is the one that made me stop and pay real attention. When you shoot in S-Log3 or another log profile, your footage captures far more highlight information than it appears to contain. What looks blown out in your viewer often has recoverable detail hiding in those near-highlight regions. Standard LUTs crush that detail during the color transform. Dehancer's Film Compression preserves it by compressing the highlight rolloff the way actual film does: a gentle, organic rolloff instead of a hard digital clip. The first time I applied it to a sunset shoot where I'd written off the sky as blown, I got usable sky detail back while maintaining the natural glow. That's a deliverable shot versus a shot I'd bury in the timeline.
Beyond compression, Dehancer offers over 60 film stock profiles based on actual lab densitometry and colorimetry of real film: Kodak Vision3, Portra, Fuji Velvia, Ilford HP5, CineStill, and dozens more. Each stock has its own color signature, contrast curve, and grain structure built from real analysis, not approximation.
The Film Stocks I Actually Use on Client Work
With 60+ options, it's easy to get lost scrolling through the library. After a year of testing across different project types, here are the stocks I keep coming back to and why:
For bright, editorial fashion and lifestyle work, I default to Kodak Portra 160 or 400. Portra is famous for its skin tone rendering, and Dehancer's emulation delivers. Skin stays warm and natural even under mixed lighting conditions that would normally require heavy correction. For punchy landscape and travel content, Fuji Velvia 50 brings the saturated, dimensional color that Velvia is known for without crossing into garish territory.
For cinematic commercial work and brand films, I reach for Kodak Vision3 250D in daylight scenarios and 500T for tungsten. These are the stocks Hollywood shoots on, and they give footage a narrative quality that clients immediately respond to. They can't always articulate why it looks 'more professional,' but they feel it. For moody editorial or fashion work, LomoChrome Metropolis XR delivers a desaturated, contrasty look that prints beautifully.
For black-and-white conversions, Ilford HP5 Plus and Kodak Tri-X 400 are both excellent, each with distinct grain character. HP5 is finer and more controlled; Tri-X has that classic photojournalistic grit.
Grain, Halation, and Bloom: The Details That Sell the Look
This is where Dehancer separates itself from every competitor I've tested. Most plugins overlay grain as a static texture layer. It looks like exactly what it is, grain pasted on top of an image. Dehancer models grain the way it actually appears in film, varying in intensity based on exposure and interacting with the luminance and color channels of your image. You can choose the film format (8mm, 16mm, 35mm, 65mm) and each produces a different grain structure. The result has a three-dimensional quality that static overlays simply cannot replicate.
Halation is the warm orange-red glow around bright light sources in film, caused by light scattering backward through the emulsion and bouncing off the backing layer. Bloom is optical diffusion, the soft, dreamy glow you'd get from a Black Pro Mist filter. Both are physical optical phenomena, and Dehancer models both accurately. I used to shoot with physical diffusion filters on every commercial session. They're beautiful, but you're committed. If you went too heavy, there's no fix in post. With Dehancer, I have complete flexibility. Full control after the shoot, with results that are genuinely indistinguishable from the real optical effect in the final deliverable.
My Complete Dehancer Workflow (Step by Step)
Here's exactly how I use Dehancer Pro on a typical client project, from import to export:
First, install and add the plugin to your NLE (Premiere Pro, DaVinci Resolve, Final Cut Pro, or After Effects). I apply it on an adjustment layer in Premiere so the effect covers multiple clips. The critical first step that most people miss: change the Input Source from Rec 709 to your actual camera and log profile (Sony S-Log3, Canon C-Log2, etc.). Skip this and the colors will look completely wrong because Dehancer is interpreting your footage incorrectly.
Next, select your film stock. Then dial in Film Compression. I typically set the impact to 50-70 depending on how much highlight recovery the scene needs. Film Developer simulates push/pull processing. Color Boost uses perceptual saturation that preserves skin tones while making skies and foliage pop. I keep these controls subtle. Film is beautiful partly because it's not over-processed. Aim for 20-40% on most sliders.
Print Simulation adds the final layer, simulating how cinema film gets printed on Kodak 2383 or Fujifilm 3513 stock. It deepens blacks, warms midtones, and adds that theatrical quality. It's subtle but it's the last 10% that makes digital footage genuinely feel like projected film.
The real game-changer: once you've dialed in your settings, scroll to the bottom and hit Generate LUT. Dehancer bakes your entire configuration (Film Compression, stock emulation, grain, halation, everything) into a single LUT file. Build custom LUTs for scenarios you shoot regularly (sunset beach, indoor tungsten, overcast portraits), and apply them like standard LUTs on future projects for instant results. You get Dehancer's sophisticated processing to create the look, but the speed of LUTs for application. That's permanent value from a one-time investment.
Dehancer Online: Matching Film Looks Across Photo and Video
If you're a hybrid shooter like me, delivering both stills and motion to clients, Dehancer Online is a browser-based tool that applies the same film stock emulations to photographs. Same stocks, same processing, same look. My workflow: upload JPEGs from my Fuji camera to Dehancer Online, cycle through film stocks visually to find the right look, then apply those exact settings in the plugin to my video footage. The result is photos and video that genuinely look like they were shot on the same roll of film. For brand consistency across deliverables, this is invaluable.
The visual preview in Dehancer Online is also incredibly helpful for stock selection. In the plugin, you're going through dropdowns and testing things blind. Online, you can see all the stocks applied to your actual image and pick the right one instantly. I wish the desktop plugin had this same visual preview. It's my single biggest feature request.
Want this look for your brand?
The film-inspired color grading I use on client work creates a distinctive, timeless aesthetic. Let's bring it to your project.
Get a QuoteIs Dehancer Pro Worth the Investment?
Let me be direct. Dehancer Pro costs $449 for a perpetual license. That's real money compared to a $49 LUT pack. Here's how I think about the value:
If you're a hobbyist shooting for fun, it's probably overkill. Free Resolve LUTs or a budget LUT pack will get you results you're happy with. The difference Dehancer provides matters most when the work is going in front of clients.
If you're a professional delivering paid work, especially if you shoot multi-camera events, deal with challenging mixed lighting regularly, or need photo-video visual consistency, it pays for itself quickly. The time savings alone justify it. Before Dehancer, I'd spend 30-60 minutes per project fighting with LUTs, layering grain overlays, and manually recovering highlights. Now I spend 5-10 minutes in Dehancer and get a better result. Over a year of projects, that time adds up to dozens of hours reclaimed.
The custom LUT export feature means you're building a library that provides value indefinitely. Every LUT you generate is yours to keep and reuse regardless of whether you maintain a Dehancer subscription. That's not a rental. It's an investment that compounds.
What could be better: Film Compression is computationally heavy, and 4K playback can stutter. Use proxies or render previews if your machine struggles. And as I mentioned, the desktop plugin needs visual stock previews like the online version has. Those are my only real complaints after 14 months of daily use.
Watch My Full Dehancer Workflow
I put together a complete video walkthrough covering everything in this review: live demonstrations, before-and-after comparisons with my old LUT workflow, multi-camera matching, Film Compression in action, and how to build custom LUTs for your own shooting scenarios. If you want to see Dehancer Pro in action before you commit, this is the place to start:
Watch the Full Dehancer Pro Tutorial on YouTube
The video shows visual differences that are hard to convey in writing, especially the highlight rolloff comparison and the grain quality difference between Dehancer and standard overlays.
The Bottom Line
After over a year of real-world client use, Dehancer Pro is the single most impactful post-production tool I've added to my workflow. It didn't make me a better colorist. It made color grading something I no longer have to fight with. The film emulation is the most authentic I've tested. Film Compression genuinely preserves highlight detail that LUTs destroy. The guided workflow keeps me moving instead of lost in menus. The export LUT feature provides permanent, compounding value. And Dehancer Online makes hybrid photo-video consistency effortless.
It's not magic. It won't fix bad footage or replace good lighting. But if you're already shooting well and want your digital work to carry authentic film character (the organic highlight rolloff, the dimensional grain, the color depth) this is the best tool I've found. Nothing else comes close.
If you decide to try it, use code HD10 at checkout for 10% off. There's also a free trial with a watermark so you can test it on your own footage before committing.