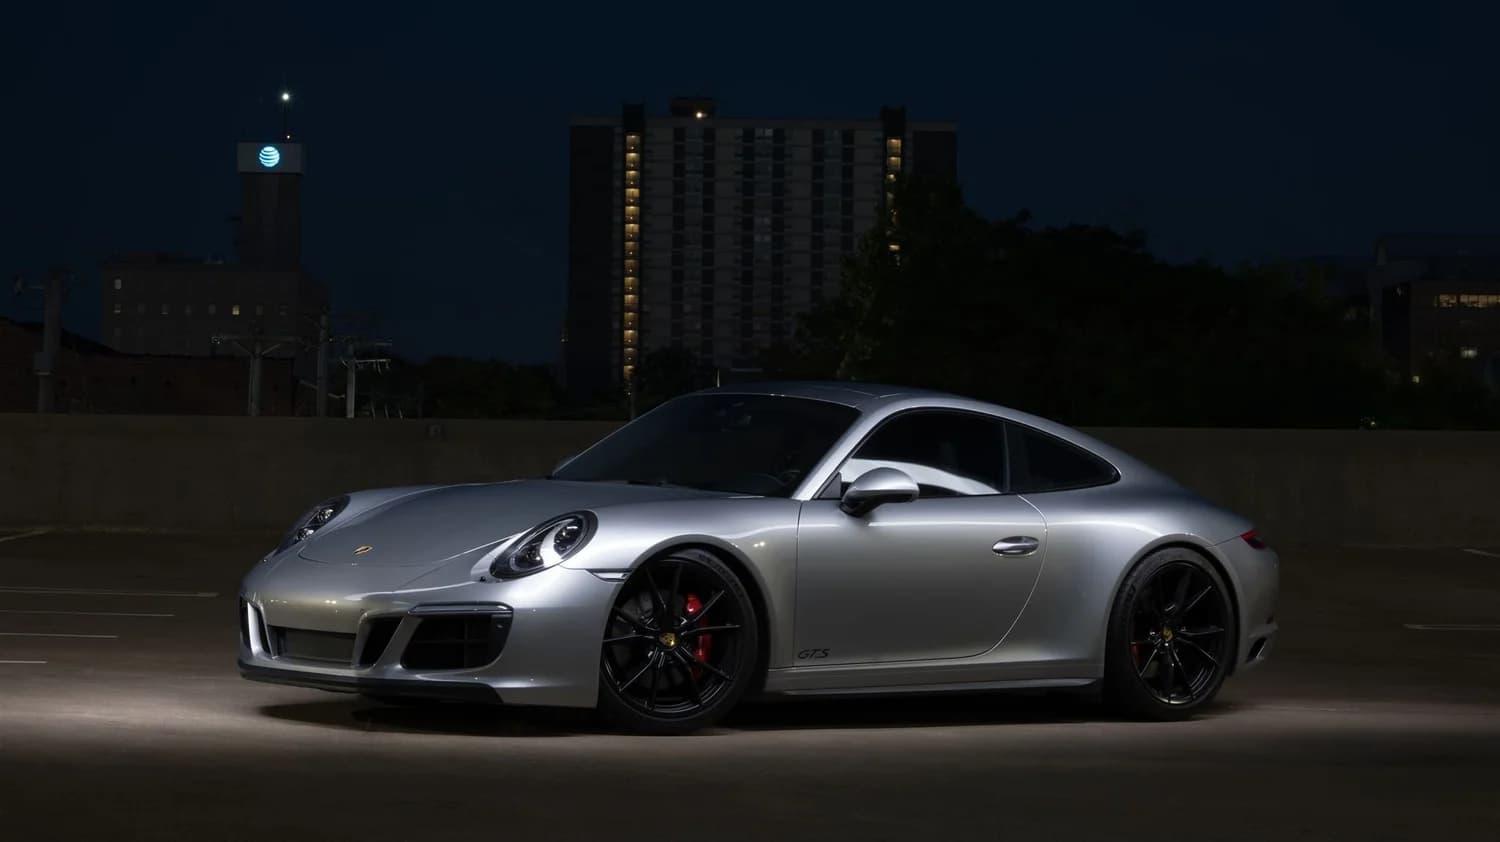
Car light painting is one of the most rewarding techniques I practice as a commercial photographer. It's slow, technical, and demands a level of patience that most people don't associate with photography, but the results are impossible to replicate any other way. When Chris brought his 2018 Porsche GTS to me for an automotive portrait, we spent an entire evening on a parking garage rooftop building a single image from over 30 individual exposures. This is exactly how I did it, step by step, so you can try it yourself.
Why Light Painting Beats Traditional Car Photography
Most automotive photography relies on ambient light or strobes, and both have real limitations. Natural light is beautiful but uncontrollable: you're at the mercy of weather, time of day, and whatever reflections the environment throws at you. Strobes give you control over intensity and direction, but a single flash frame captures everything at once, including every ugly reflection from surrounding buildings, street lights, or passing cars.
Light painting flips the process entirely. You work in near-total darkness with long exposures, selectively illuminating only the parts of the car you want to highlight. Every panel, every curve, every badge gets its own dedicated light pass. You choose where highlights fall, how shadows wrap, and which details pop. The result is a level of dimensionality and drama that a single exposure simply cannot achieve. When I composite those 30+ passes together in Photoshop, the final image looks like the car is lit by a Hollywood crew, because in a sense, it is. I'm just doing it one section at a time.
My Gear List for Automotive Light Painting
You don't need $50,000 in equipment, but you do need the right tools for the job. Here's exactly what I bring to every car light painting session:
Camera & Support:
Lighting:
Calibration & Safety:
The total investment for a light painting kit beyond your camera body is roughly $500-800. The Godox LC500 and a good flashlight do 90% of the work.
Camera Settings That Make or Break the Shot
Light painting is unforgiving with settings. One wrong parameter and you'll waste an entire evening. Here's what I dial in before the first exposure:
ISO: Lowest native ISO, typically ISO 100. You're stacking multiple long exposures, and any noise multiplies across 30+ layers. Low ISO keeps everything clean.
Aperture: f/16 to f/22. This feels counterintuitive since you're shooting in the dark, but you need maximum depth of field. The car is a large, three-dimensional object, and you want the front bumper as sharp as the rear spoiler. The small aperture also means you need more light per pass, which gives you finer control over exposure.
Shutter: Bulb mode exclusively. Each pass runs anywhere from 10 seconds to over a minute, depending on how much surface area you're covering. A remote trigger opens the shutter, I paint the light, then my partner closes it.
Focus: Manual. Autofocus in the dark is a disaster. I focus at my working aperture using a flashlight to illuminate the car temporarily, confirm sharpness on the tethered monitor, then lock focus for the rest of the session. Do not touch the focus ring again.
Critical settings to disable:
The tethered monitor is essential here, not optional. Every pass needs to be evaluated immediately. You're checking for hot spots, blown highlights, and coverage gaps that you'll need to reshoot before moving on.
The Five-Pass Light Painting Process
This is where the image gets built, one layer at a time. I think of light painting like painting with oils: you start with a broad underpainting and progressively add detail.
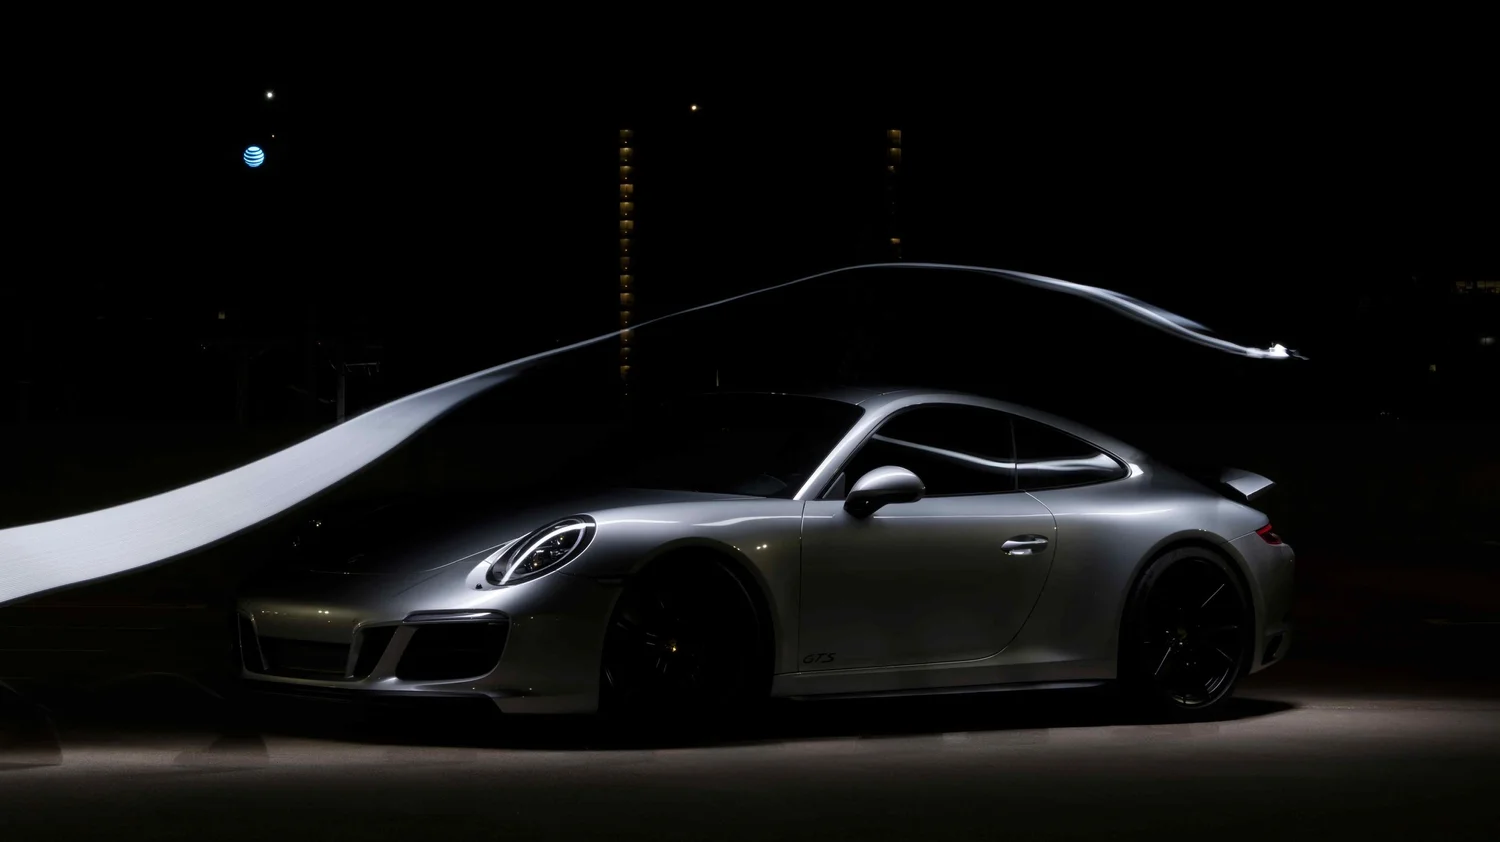
Pass 1, Base Fill: I start with broad, even sweeps of the LC500 across the entire car. The light wand moves continuously during the exposure, which effectively turns a small LED panel into a massive softbox. The movement averages out the light, creating a smooth, even foundation. Think of this as your base exposure. It won't look dramatic on its own, but it sets the tonal range for everything that follows.
Pass 2, Top-Down Hero Pass: This is the signature pass. I extend the LC500 overhead on a monopod and sweep it along the length of the car from above. This creates bold, directional highlights that follow the car's body lines: the hood crease, the roofline, the rear haunches. These overhead sweeps produce dramatic contrast and shadow structure that becomes the visual backbone of the final composite. I shoot multiple variations at different heights and angles to give myself options. The shadow cast on the ground matters too. It creates its own compositional line, so I make sure it looks intentional.
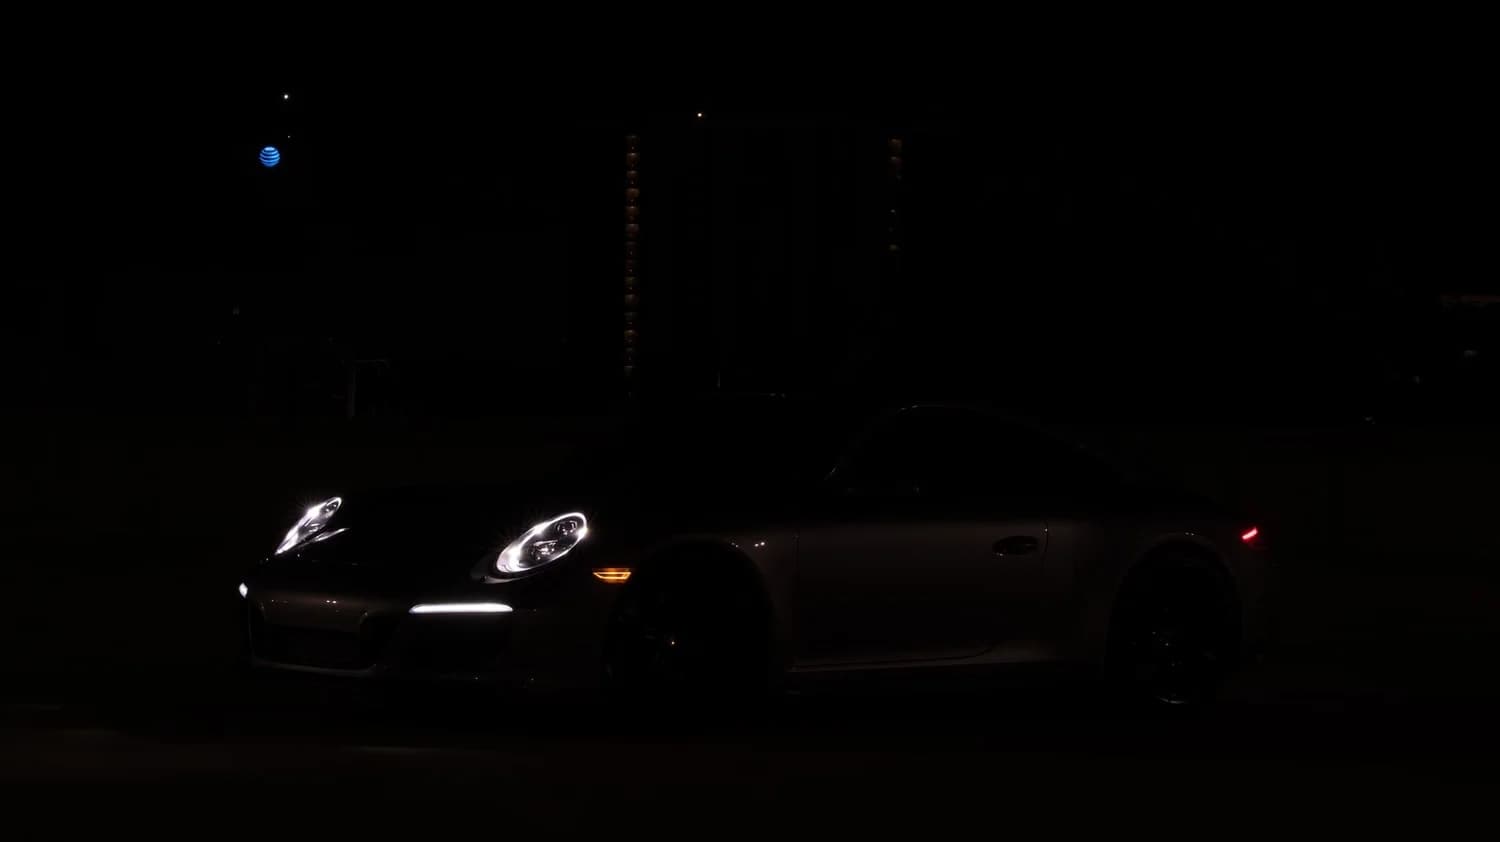
Pass 3, Detail and Accent Lighting: Now I switch to the Eagtac flashlight with a snoot modifier for precision work. This is where the car's personality comes through. I light the wheels individually (Chris angled them to show the full face of the rim), illuminate the interior (seats, dash, steering wheel) and pick out badges, trim, and emblems. Chris pointed out the leather stitching on the interior and the rear active spoiler as details that mattered to him, so we spent extra time getting those right. We also had him turn on the headlights and taillights for dedicated exposures. Those iconic glows add life when composited into the final image.
Pass 4, Rim Light and Backlighting: This is the most cinematic element. I position a light behind the car and sweep it to create a subtle edge highlight that outlines the vehicle's silhouette. This rim light separates the car from the dark background and adds a three-dimensional pop that makes the image feel like it's jumping off the screen.
Pass 5, Ambient and Before Frame: Before wrapping, I capture a clean ambient exposure with no light painting, just whatever the environment provides naturally. This serves double duty: it's your "before" comparison image, and it provides a natural background plate that you can composite in if the painted background layers look too dark or uneven.
Pro tip: work with a partner. Chris triggered the shutter while I handled the lighting, and it made the session dramatically more efficient. Trying to light paint solo means running back and forth between the camera and the car, and every extra second risks bumping something.
The Composite Process in Photoshop
Back in the studio, this is where 30+ raw files become one finished image.
I start in Lightroom by applying the calibrated color profile from the ColorChecker, then make basic exposure and white balance corrections across all frames. Consistency here matters. If your base corrections drift between frames, the composite will look patchy.
In Photoshop, I stack every exposure as a separate layer. The base fill pass goes on the bottom. From there, I work up through the hero passes, detail layers, and rim lighting. Each layer gets a mask, and I selectively reveal only the best-lit portions of each frame using brush masks. This is an additive process. You're combining the strongest highlights and best-lit areas from dozens of exposures into a single image that's lit more beautifully than any single frame could be.
I work in 16-bit sRGB throughout for smooth tonal transitions and to avoid banding in gradients, especially important in the dark, smooth body panels of a car like the GTS.
Sharpening is the final step, and restraint is critical. I use selective sharpening through layer masks, applying it only to detail-rich areas like badges, wheel spokes, and panel edges. Over-sharpening smooth surfaces like the hood or fenders introduces ugly banding. AI-assisted sharpening tools like Topaz can help, but apply them selectively, never globally.
If the background needs work (and it usually does) I'll composite in a sky or clean up the parking structure elements. The key is matching perspective, focal length, lighting direction, and color temperature so the composite feels believable rather than pasted together.
Need product or automotive photography?
From light painting to lifestyle product shots, I bring the same precision to every commercial project.
Get a QuoteWatch the Full Process
I documented this entire Porsche GTS session on video. You can see the light passes in real time, the tethered review process, and the Photoshop composite from start to finish. The video covers angles and decisions that are hard to convey in photos alone: how I move the light, how fast I sweep, and how each pass looks on the tethered monitor before I move on to the next.
Common Mistakes That Will Ruin Your Session
I've made every one of these mistakes so you don't have to:
Bumping the tripod or the car. Even a millimeter of shift between frames makes layers impossible to align in post. I've lost entire sessions to a kicked tripod leg. Tape your tripod feet to the ground if the surface is slippery, and keep a clear path around the car.
Shooting in too much ambient light. If you can read a book at your location, it's too bright. Ambient light fills in shadows you're trying to control, reducing contrast and making your light passes fight against the environment. Scout your location after dark and pick the darkest section available.
Moving the light too fast. A common beginner mistake. Fast sweeps produce thin, streaky highlights. Slow, deliberate passes create broader, smoother light that wraps the panels convincingly. I tell people to move at roughly half the speed they think is right.
Forgetting to check ETTR on the tethered monitor. Each pass should be exposed to the right, as bright as possible without clipping. Under-exposed passes introduce noise when you brighten them in post, and that noise stacks across layers. Check the histogram after every single frame.
Not shooting enough passes. More is always better. You can delete layers in Photoshop; you can't go back and re-shoot a pass you didn't capture. I typically shoot 30-50 exposures for a single final image. Some get used, many don't, but I never regret having options.
Wearing bright clothing or a headlamp. You're in the frame during every pass. Bright clothing reflects your own light back at you and can appear as ghosting in the composite. Wear all black, and if you need a headlamp to navigate, use one with a red mode that won't contaminate your exposures.
Why This Technique Translates to All Commercial Product Photography
Light painting isn't just for cars. The same principles, selective illumination, layered exposures, precise composite work, apply to any product where you need total control over how light interacts with the subject. I use variations of this technique for high-end product photography, architectural detail work, and commercial still life projects where a single strobe setup can't achieve the dimensionality the client needs.
The discipline of light painting makes you a better photographer across the board. It forces you to think about light as a construction material rather than something you react to. Every commercial project I shoot benefits from the patience, precision, and intentionality that light painting demands.
If you're a car enthusiast who wants their vehicle immortalized in this style, or a brand that needs product photography with this level of detail and craft, I'd love to collaborate. This kind of work is deeply personal to me, and it shows in the results.